⚙️ Area Manager Settings
This page allows you to customize the permissions and settings for area managers, ensuring each manager has appropriate access to information and functions related to their area only. You can define what the area manager can see and control when they access the dashboard.
How to Access:
Sidebar ← Country System ← Roles ← Area Manager
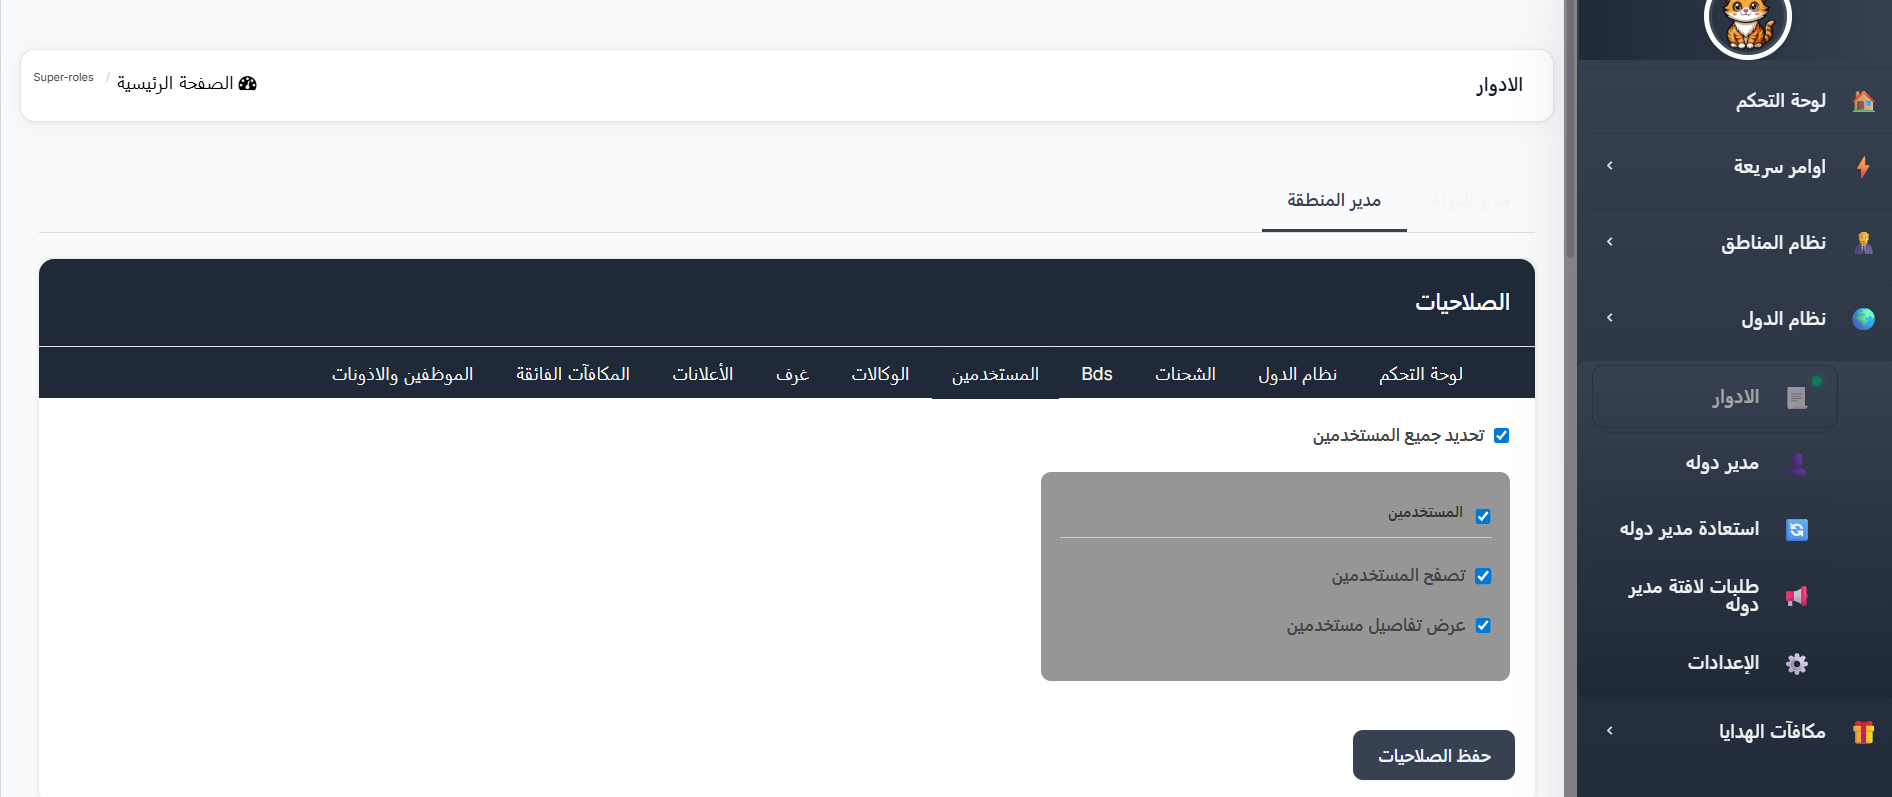
Editing Area Manager Permissions:
When you navigate to the Roles page and select the "Area Manager" tab, the Permissions page will appear containing several tabs, each controlling a specific section of the dashboard.
Permission Sections:
The permissions page is divided into the following tabs:
| Tab | Description |
|---|---|
| Dashboard | Control access permissions to the main dashboard and its elements |
| Country System | Control permissions for managing countries and regions |
| Charges | Control permissions for charging and balance operations |
| Bds | Control permissions for the Bds system |
| Users | Control permissions for managing users and viewing their data |
| Agencies | Control permissions for managing agencies |
| Rooms | Control permissions for managing rooms |
| Announcements | Control permissions for managing announcements |
| Super Rewards | Control permissions for the super rewards system |
| Staff and Permissions | Control permissions for managing staff and permissions |
How to Edit Permissions:
For each of the tabs above, you can control the following permissions:
| Permission Type | Description |
|---|---|
| Select All | Enable or disable all permissions in this section at once |
| Browse | Allow the area manager to browse and view lists |
| View Details | Allow viewing full details of items |
| Create | Allow creating new items (users, rooms, agencies, etc.) |
| Edit | Allow editing existing items |
Steps to Edit Permissions:
- Navigate to the Roles page: Sidebar ← Country System ← Roles.
- Select the "Area Manager" tab at the top of the page.
- Choose the desired tab: Click on the tab you want to edit permissions for (e.g., Users, Rooms, Agencies, etc.).
- Select permissions: Check ✅ the permissions you want to grant to the area manager, or uncheck to revoke the permission.
- Use "Select All": If you want to enable all permissions in a specific section at once.
- Click "Save Permissions" at the bottom of the page to save changes.
Example
To grant the area manager permission to view user data only without creating or editing:
- Go to the Users tab
- Enable Browse Users ✅
- Enable View User Details ✅
- Leave Create and Edit permissions unchecked
- Click Save Permissions
Warning
Make sure to review permissions carefully before saving. Granting unnecessary permissions may expose sensitive data to the area manager.
Tip
You can customize different permissions for each section independently. For example: allow browsing users while preventing editing, or allow full room management while restricting access to charges.