➕ Create VIP Level
Introduction
From this page you can create a new VIP level and specify all its details, including level name, price, subscription duration, and the privileges/features that the user will receive when subscribing to this level.
How to Access:
💎 VIP ← + New
VIP Creation Form
When clicking the "+ New" button from the main VIP page, the following creation page opens:
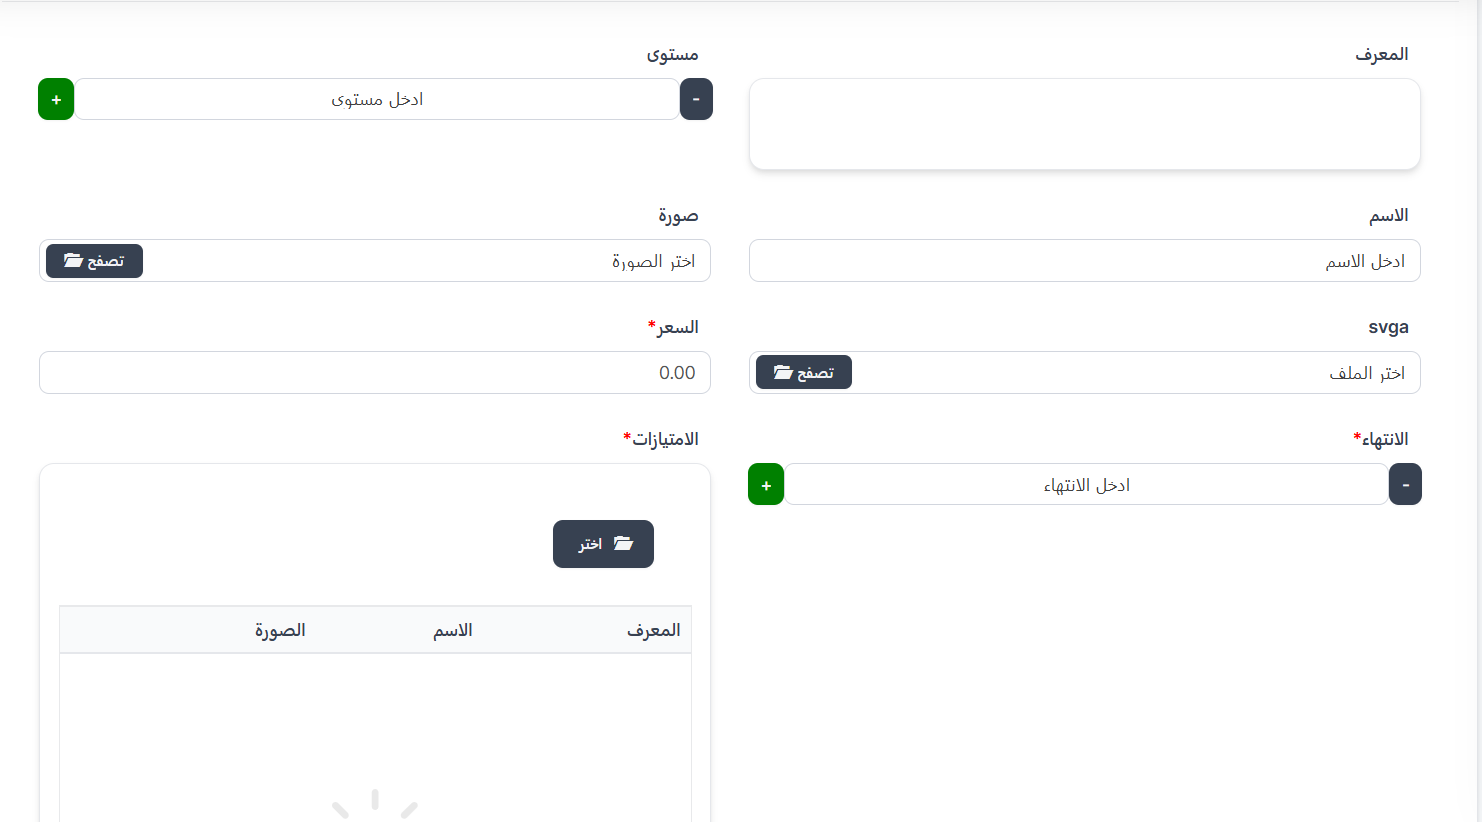
Form Fields:
| Field | Description | Required |
|---|---|---|
| ID | VIP level identifier (auto-generated or manually entered) | No |
| Level | VIP level number (use + and - buttons to adjust) | ✅ Yes |
| Name | VIP level name (e.g., VIP 1, VIP 2... etc.) | ✅ Yes |
| Image | VIP level icon/image - click "Browse" to select | ✅ Yes |
| svga | SVGA file for animated VIP effects - click "Browse" to select | No |
| Price* | Subscription price in Coins 💰 | ✅ Yes |
| Expiration* | Subscription validity period in days (use + and - buttons) | ✅ Yes |
| Privileges* | Features the user will receive when subscribing to this level | ✅ Yes |
Selecting Privileges
What are Privileges?
Privileges are the features and properties that the user will receive when purchasing this VIP level. You can select more than one feature for each VIP level.
How to Select Privileges:
- In the Privileges field, click the "📁 Choose" button.
- A popup window will appear displaying all available privileges in the system.
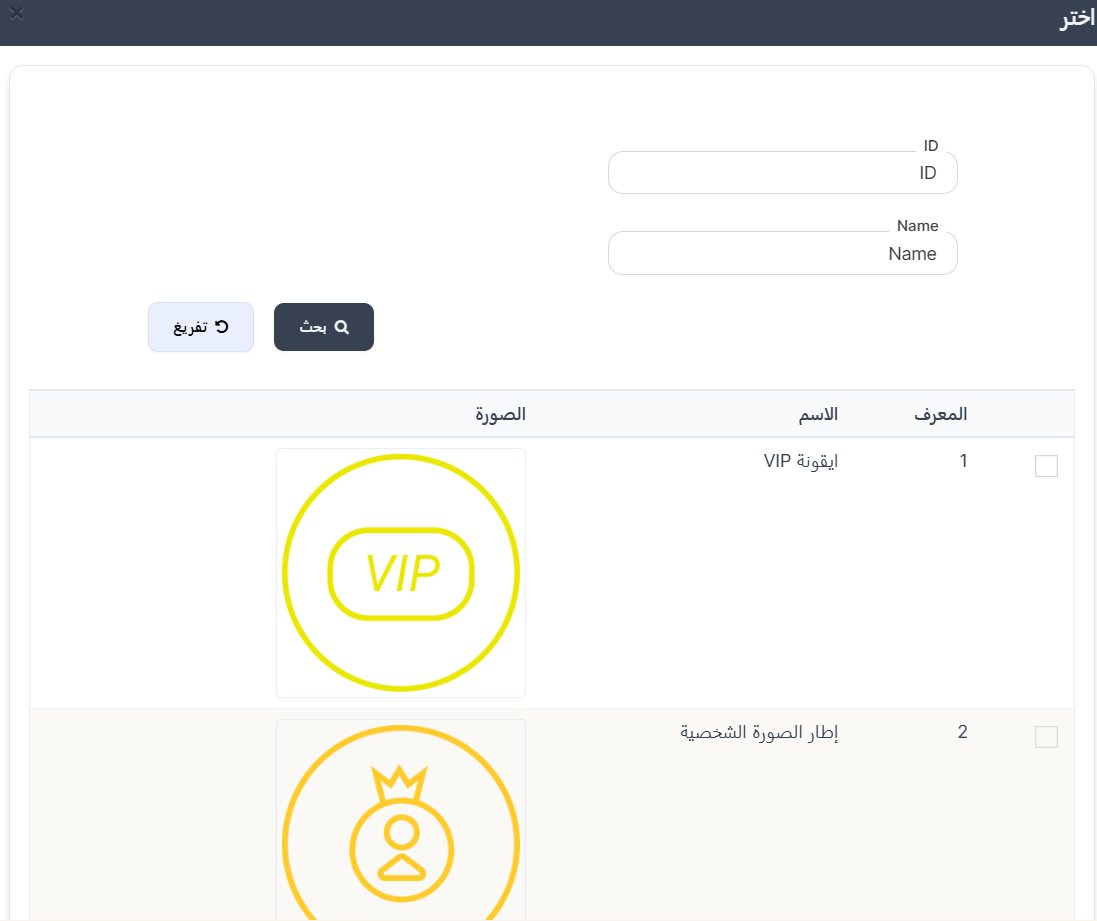
- The window displays a table with the following columns:
| Column | Description |
|---|---|
| ☑️ | Checkbox to select the privilege |
| ID | Privilege identifier |
| Name | Privilege name |
| Image | Privilege icon/image |
- Select the desired privileges by clicking the checkbox (☑️) next to each privilege you want to add to this level.
- You can select one or more privileges per level.
- After selection, the selected privileges will appear in the privileges table below the "Choose" button.
Available Privileges:
| ID | Name | Description |
|---|---|---|
| 1 | VIP Icon | VIP badge/icon next to the user's name |
| 2 | Profile Picture Frame | Distinctive frame around the user's profile picture |
| 3 | Vehicle | Distinctive vehicle when entering rooms |
| 7 | Chat Bubble | Distinctive chat bubble shape |
| 10 | Exclusive Gifts | Exclusive gifts for VIP members |
| 11 | Kick Protection | User cannot be kicked from rooms |
| 12 | Ban Protection | Profile protection from banning |
| 13 | Hidden Room | Hide room from public list |
| 14 | Mystery Person | Enter rooms invisibly |
| 15 | Colored Name | Color the user's name with a distinctive color |
| 16 | GIF Image Upload | Upload and use animated GIF images as profile picture |
| 17 | Hide Country | Hide user's country from profile and user lists |
Important Note
- You can select more than one privilege for the same VIP level.
- The higher the level, it's recommended to add more privileges to justify the price difference.
- All selected privileges will be available to the user throughout the subscription validity period (Expiration).
Steps to Create a New VIP Level
- From the main VIP page, click "+ New".
- Enter the level number using (+) and (-) buttons.
- Enter the level name (e.g., "VIP 8").
- Upload the level icon/image by clicking "Browse".
- Upload the SVGA file (optional) for animated effects.
- Enter the price in Coins.
- Set the expiration period in days using (+) and (-) buttons.
- Click "📁 Choose" in the Privileges field to select features.
- Select the desired privileges from the list by clicking checkboxes.
- Click "Submit" to save the new VIP level.
Additional Save Options:
| Option | Description |
|---|---|
| View | View the VIP level after saving |
| Continue Creating | Continue creating new VIP levels after saving |
| Continue Editing | Stay on the editing page after saving |
Tips
- Set graduated and logical prices between levels (e.g., VIP 1 = 1,000,000 → VIP 2 = 2,000,000).
- Add more privileges to higher levels to encourage users to upgrade.
- The default expiration period is usually 30 days, but you can adjust it according to your strategy.
- Make sure to upload a distinctive and attractive image for each VIP level.